This step-by-step guide outlines essential practices for safely using resistance bands, particularly Amazon Basics Resistance Bands, to enhance your fitness routine while reducing the risk of injury. It emphasizes proper techniques such as checking for wear and tear before use, maintaining correct form during exercises, and gradually increasing resistance to prevent strain. Additionally, the guide highlights the importance of warming up and cooling down, as well as listening to your body to avoid overexertion. By following these recommendations, users can confidently incorporate resistance bands into their workouts, fostering a safe and effective training experience.
Preventing Injuries with Resistance Bands: Essential Tips
Choose the Right Resistance Band
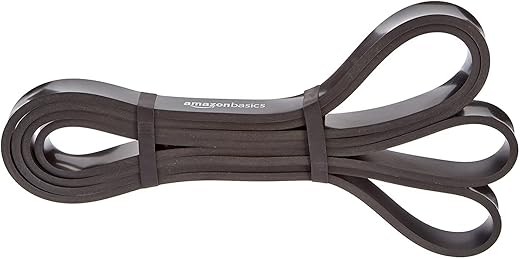
Select a resistance band that matches your current fitness level and the type of exercises you intend to perform. Evaluate your strength and experience; if you are a beginner, opt for a lighter band to prevent injury and overexertion. Look for bands labeled as light or medium resistance, as these will help you learn proper form and technique without straining your muscles. Amazon Basics offers a variety of bands, so explore their options to find a suitable choice. Consider the color code associated with each band, as they typically indicate resistance levels, making it easier to select the right one.
Experiment with different bands as you progress in your fitness journey. Once you feel comfortable with your current band, gradually increase the resistance by choosing a heavier band. Incorporate exercises that target various muscle groups, such as squats, rows, or chest presses, to maximize your workout effectiveness. Monitor how your body responds to the resistance and adjust accordingly; if you find a band too challenging, don’t hesitate to revert to a lighter option until you build more strength. Remember, the goal is to enhance your fitness while ensuring safety and proper technique throughout your workouts.
Inspect Your Resistance Band
Inspect your resistance band carefully before each use. Look closely for any signs of wear and tear, such as fraying edges, cracks, or discoloration. Pay attention to the areas where the band stretches the most, as these are more likely to show signs of damage. Run your fingers along the band to feel for any rough spots or uneven textures. If you find any defects, do not ignore them. Using a damaged band can lead to serious injuries, such as strains or tears.
Replace the band immediately if you notice any damage. Do not attempt to use it, even if the damage seems minor. Choose a new resistance band that meets your workout needs and is appropriate for your fitness level. Store your new band in a cool and dry place to extend its lifespan. Regularly recheck your band before each workout to ensure it is in good condition. Prioritize your safety by keeping your equipment in top shape.
Warm Up Before Using the Bands
Engage in at least 5-10 minutes of light cardio to elevate your heart rate and increase blood flow to your muscles. Choose activities like brisk walking, jogging in place, or jumping jacks. Maintain a steady pace to ensure your body warms up sufficiently. Focus on keeping your movements controlled and deliberate, allowing your body to gradually adapt to increased activity.
Incorporate dynamic stretching exercises to further prepare your muscles and joints. Perform leg swings, arm circles, and torso twists to enhance your range of motion. Keep your movements smooth and continuous, avoiding any bouncing or jerking motions. Aim for 8-10 repetitions of each stretching exercise, ensuring that you target all major muscle groups, especially those you plan to work with the resistance bands.
Use Proper Form and Technique
Maintain proper form and technique by keeping your core engaged throughout the exercise. Engage your abdominal muscles to stabilize your body, reducing the risk of injury and enhancing your performance. Align your body correctly by positioning your shoulders over your hips and your knees in line with your toes. Avoid arching your back or leaning forward excessively; instead, focus on maintaining a neutral spine. Ensure that your movements are controlled and deliberate, preventing any jerky or rapid motions that could compromise your form.
Consult instructional videos or a fitness professional if you are unsure about your technique. Watch reputable sources that demonstrate the correct form for resistance band exercises, paying close attention to body alignment and movement patterns. Practice in front of a mirror to monitor your form, making necessary adjustments as you go. Seek feedback from a knowledgeable trainer if possible, as they can provide personalized guidance and corrections to enhance your technique. Always prioritize form over the amount of resistance used to ensure safe and effective workouts.
Cool Down and Stretch After Exercise
Complete your workout with a proper cool-down and stretching routine. Gradually decrease your exercise intensity for about 5-10 minutes. This can include walking or lightly jogging to bring your heart rate down. Once your heart rate stabilizes, move on to static stretches. Focus on the major muscle groups you engaged during your workout, especially those targeted with resistance bands. Hold each stretch for 15-30 seconds, breathing deeply to help your muscles relax.
Target specific muscles worked, such as the quadriceps, hamstrings, shoulders, and back. For your quadriceps, stand on one leg, grab your ankle, and pull it toward your glutes. For your hamstrings, sit on the ground with one leg extended and reach toward your toes. Stretch your shoulders by bringing one arm across your body and holding it with the opposite arm. To stretch your back, sit on the ground, reach forward, and hold the position. Remember to maintain a relaxed posture throughout the stretches, and don’t bounce; instead, gently ease into each position for maximum effectiveness.
Key Takeaways for Safe Use
In conclusion, prioritizing safety while using resistance bands is essential for effective and injury-free workouts. By choosing the appropriate band, regularly checking for wear and tear, warming up effectively, maintaining proper form, and cooling down afterward, I can fully enjoy the advantages of resistance training. By adhering to these guidelines, I can enhance my fitness journey while keeping injuries at bay.
Essential Gear Checklist
Maximize Safety First
Getting Started: Effective Techniques and Safety Tips for Using Amazon Basics Resistance Bands
- Choose the Right Band: Start with a lighter resistance band to ensure proper form and technique. As I gain strength, I can gradually increase the resistance
- Warm Up: Before using the bands, I make sure to warm up my muscles with some light cardio or dynamic stretches to prevent injury
- Focus on Form: When performing exercises, I prioritize maintaining proper form over the number of repetitions. This helps me target the right muscles effectively
- Incorporate Basic Exercises: I can start with simple exercises like bicep curls, squats, and rows. These movements help me get familiar with the bands and build strength
- Cool Down and Stretch: After my workout, I always take time to cool down and stretch my muscles. This aids in recovery and flexibility
Everything You Need to Know About Amazon Basics Resistance Bands
I can perform a variety of exercises with Amazon Basics Resistance Bands, including:
- Bicep Curls – Targeting the biceps by standing on the band and curling it up.
- Tricep Extensions – Overhead extensions to work the triceps by anchoring the band and pushing it upward.
- Squats – Adding resistance to squats by stepping on the band and holding it at shoulder height.
- Chest Press – Mimicking a bench press by anchoring the band behind me and pushing forward.
- Lateral Band Walks – Strengthening the hip abductors by stepping sideways while holding the band around my legs.
- Seated Rows – Targeting the back by sitting on the band and pulling it towards me.
- Deadlifts – Performing deadlifts by standing on the band and pulling it up as I hinge at the hips.
These bands are versatile and can be used for various strength training and rehabilitation exercises.
Resistance levels in resistance training, such as those found in resistance bands or machines, can vary significantly compared to traditional weights like dumbbells or barbells. Traditional weights provide a constant load throughout the entire range of motion, allowing for consistent resistance based on the weight selected.
In contrast, resistance bands or machines often offer variable resistance, meaning that the resistance can change depending on how far the band is stretched or the specific mechanics of the machine being used. For example, with bands, the resistance increases as the band is stretched further, which can sometimes lead to a different muscle activation pattern compared to lifting a fixed weight.
Overall, both methods can be effective for building strength, but they may target muscles differently due to the nature of how resistance is applied. It’s important to consider personal fitness goals and preferences when choosing between these options.


Great guide! I’ve started using resistance bands for my home workouts and it’s honestly been a game changer. I used to dread lifting weights, but using bands feels way more manageable. Just a tip: I find that the ‘Amazon Basics Resistance Bands’ are super affordable and they come in different resistance levels, which is perfect for gradually increasing your strength. Anyone else love these bands?
I think it’d be cool to see a section on common mistakes people make while using resistance bands. I’ve caught myself doing some things wrong that could lead to injuries, like not securing the bands properly. Just a thought!
Great suggestion! We’ll definitely consider adding a section on common mistakes to help everyone stay safe while using resistance bands. It’s so important to use them correctly!
I adapted the warm-up step by incorporating dynamic stretches specifically for my legs and arms before using the bands. I feel like this has really made a difference in my performance and reduced soreness afterward. Would love to hear how others warm up!
Fantastic adaptation! Dynamic stretches really do help increase blood flow and prepare your muscles for the workout. Thanks for sharing your warm-up routine!
I’ve seen some debate about whether resistance bands are better than free weights. Personally, I think they both have their place in a workout routine, but I’d love to hear what others think! Do bands really provide the same benefits as weights?
That’s a great point! Both bands and weights have unique benefits. Resistance bands can improve flexibility and are excellent for rehab, while weights are great for building mass. It ultimately depends on your fitness goals!
Thanks for sharing your experience! Amazon Basics Resistance Bands are indeed a great choice, especially for beginners. They provide a variety of resistance levels, making it easier to progress over time.
I started using resistance bands after my physical therapist recommended them for rehab. I’ve seen some amazing progress in my strength and mobility. It’s been a gradual journey, but I can now do exercises I never thought I could! Anyone else have success stories?
That’s inspiring! Resistance bands are so versatile for rehabilitation and strength training. It’s great to hear about your progress! Keep it up!
I agree with the importance of inspecting your bands! I had one snap during a workout, and it was terrifying. Now, I always check for cracks or wear before I start. Also, does anyone have any tips on how to store these bands to prolong their life?
So glad you brought that up! Storing bands in a cool, dry place, away from direct sunlight, can really help extend their lifespan. Also, hanging them up can prevent tangling and wear.
I usually do bodyweight exercises with bands, but has anyone tried using them for Pilates or yoga? I’m curious about any variations you might have done. I’ve heard it can add a whole new level to the workout!
Absolutely! Using resistance bands in Pilates can enhance the challenge of certain moves. It provides extra resistance, helping to build strength while maintaining flexibility. Definitely worth a try!